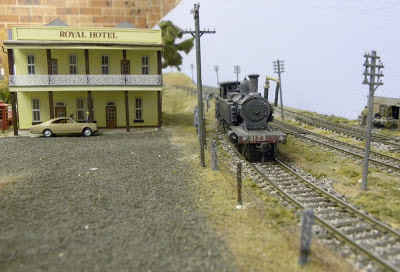
This was a job that kept sliding down the 'to do' list until I ran out of excuses for not doing it. In NSW, most rural areas, by the 1960s, had well established fences. I had constructed a few around specific buildings, one particular house and the water treatment plant. However, the glaring omission was a fence between the rail easement and the Philip's Creek village. I had previously purchased a few packets of the Kerroby Models wire fences to provide the fence posts and, in my late father's workshop, I found some very light gauge wire. This was very very old wire that had cloth rather than plastic insulation. In fact, the wire is that old that I suspect that my father may have acquired it from his father who used to work in the NSW Railways Electric Car Workshops at Chullora in the 1930s to 1950s. So another convoluted reason why I should stop procrastinating.
 |
| The fence line with the bottom three wire strands fitting - and barely visible! |
 | ||
| Another view of the fence - the Royal Hotel has suffered a bit during construction |
At the time of writing, this section of fence is only 60% completed and I'm beginning to think that I have wasted my time. There are still quite a few metres of fencing to finish. Maybe, I should have just planted the fence posts to create an optical line and let people's imagination do the rest. Certainly, the wire is barely visible in the accompanying photos. This probably means the gauge of the wire is about right but this activity has convinced me never to attempt power and telegraph line reticulation!!
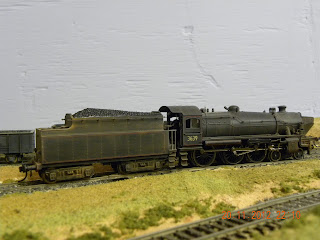
However, not wishing to close on a negative note, I have added a few photos of the latest additions to the Philip's Creek roster, the recently weathered 36 class (that sound like a contradiction of terms) and the four completed CCHs.


Phil,
ReplyDeleteI purchased 10 meters of those fence posts from Kerroby all of the same for Kamilaroi, and when I used them on Yass I used grey cotton and super glued them about every 3rd post. I used a sewing needle to thread the cotton through the posts. I found it easy but slow, and Kamilaroi might be a different story. Good luck.
Jim.
Jim,
ReplyDeleteThanks for your comment. I commend your perseverance to complete 10m of fencing. You are right, it is slow. As I contemplate things further, I think the bulk of the difficulty and hence frustration comes from having to work around other scenic elements without damaging them. The old eyes also didn't help. I have used superglue on the ends of each run, but I may try your idea and use it more frequently. I might also try a needle if I can find one thin enough.
cheers Phil
Phil, what about a needle threader, which usually comes with any set of needles ?
ReplyDeleteRegards, Walter
Walter,
ReplyDeleteThanks for the suggestion. I haven't used one to date but I suspect that the needle threader would work for the elasticised thread that I wrote about in a later post ( http://philipscreek.blogspot.com.au/2015/01/using-elasticised-cotton-for-fences.html ) but I'm not sure it would work with the wire that I was using when I wrote this article. The flexibility needed isn't there in the wire. Since then, I have moved away from the use of wire to represent the standard five strand fence.
cheers Phil
I don't know the timeline but I have just read this article and as a modeler of HO-009 I have found that for fencing I use FLORISTS WIRE available from florists or their suppliers or Spotlight stores in their craft sections.. It comes in various thicknesses (gauge?) and the one I use for fencing wire is about the thickness of cotton, flexible, but strong enough to poke through the holes in fence posts. No breakage problems.
ReplyDeleteIt comes in packets of about 20 x 30cm lengths. Hope this helps. Peter @ DY&C RR. 7/6/22.