Tuesday, 23 October 2012

More on the CCH - Two Down, 14 to Go


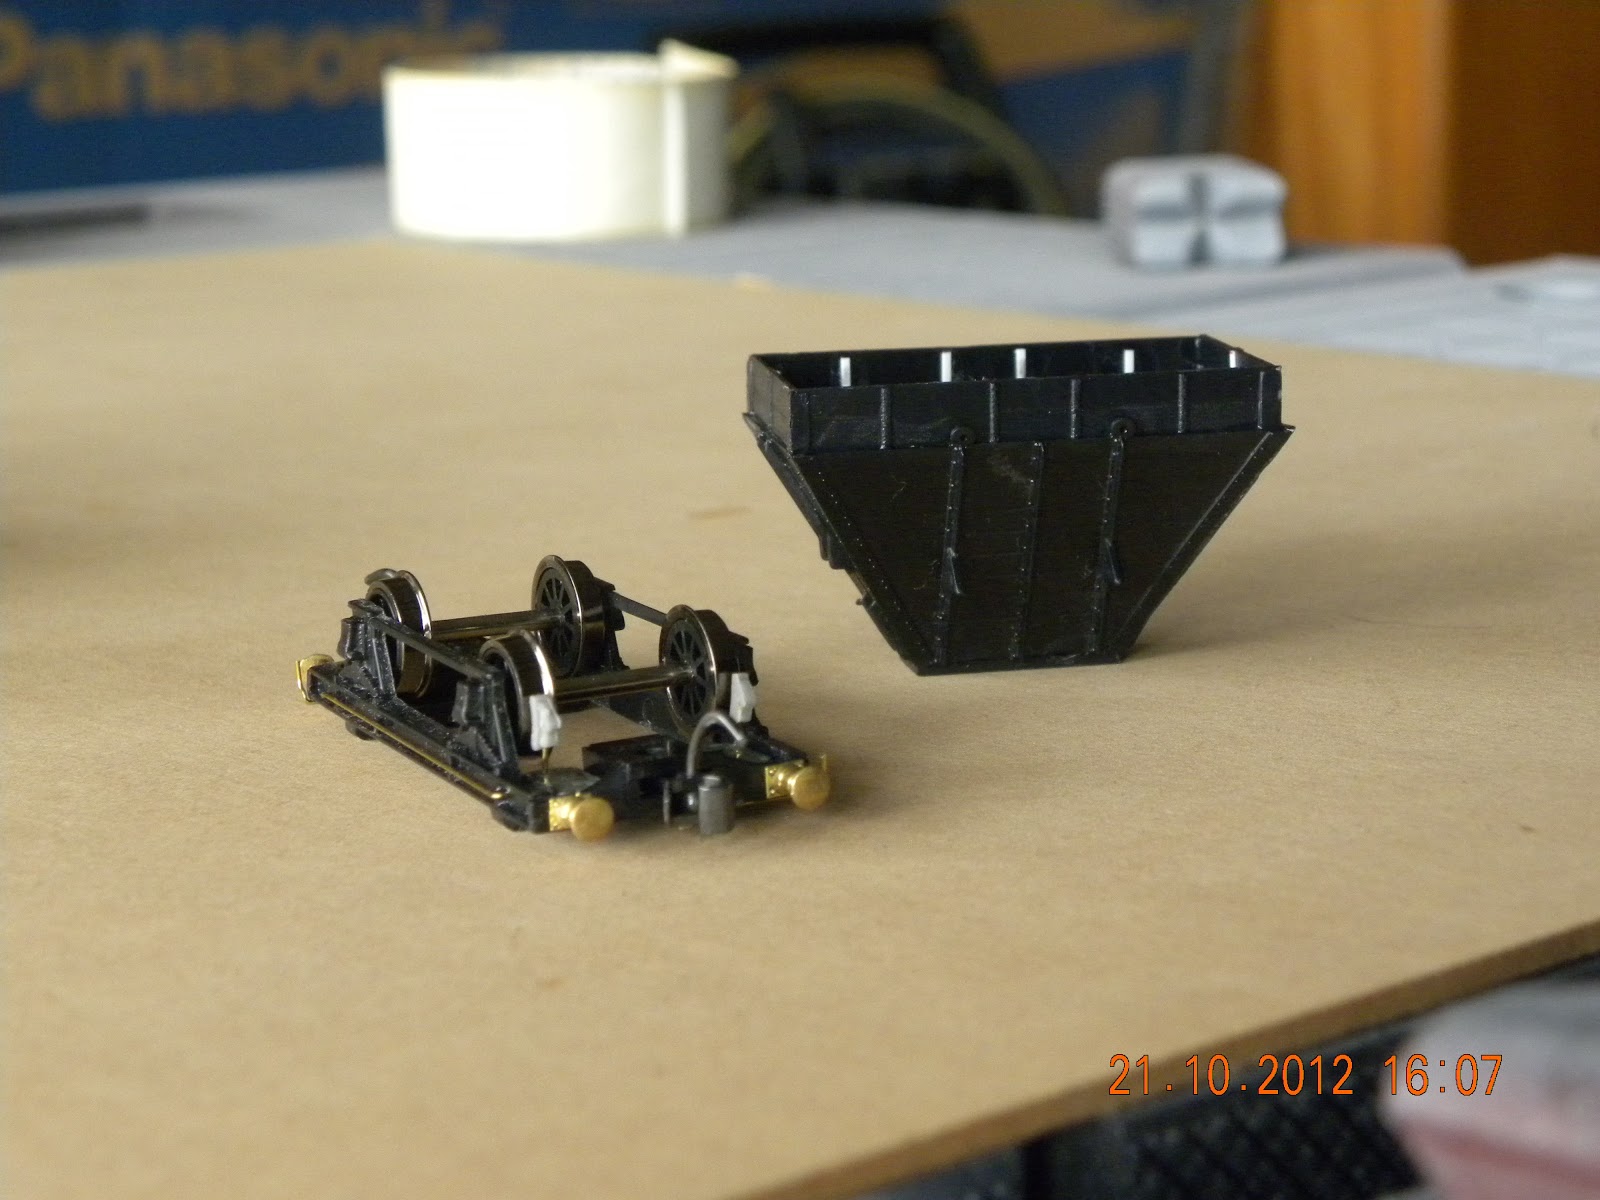
In an earlier post, I wrote about the start of construction of a fleet of CCH/LCH coal wagons. At the time, I was just about ready to start painting, but two very helpful comments provided extra information allowing me to add some more detail before going to that final step.

The first comment was from Linton (Stonequarry Creek, http://stonequarrycreek.blogspot.com.au/ ) who told me about brake shoes being sold by Ina Lindsay models. I followed up on his information and purchased a set. They are easy to fit, and have worked well. Initially, I used styrene rod to fix each shoe to the body but then decided that brass wire was easier.

The second comment from Alex, (the Mudgee Line, http://mudgeeline.blogspot.com.au/) gave me a link to photos that he had taken of CCH 20031 (http://www.flickr.com/photos/railmod/8005913637/). These proved invaluable particularly for the detail of the opening device for the hopper. I fashioned some brass wire and thin strip to replicate this arrangement.

Many thanks to both gentlemen for their input. It was greatly appreciated.


I purchased two more kits from Joe while at the Liverpool exhibition and also 'lashed out' to buy some brass buffers. For the second pair, I added a little less weight than for the first two. It will be interesting to see if there is any difference in their performance over points.

The production line
I will also be experimenting more with the weathering. Photos that I have seen from the late 1960s indicate that the CCH/LCH fleet had seen better days, and so the weathering should be able to reflect the variety of age and conditions.

So right now, the fleet consists of two completed wagons and two under construction. I’ll progressively purchase and construct kits over the next year or so to build up the fleet. There’s no great hurry and I'm sure other projects will intervene at times.


In service and awaiting pickup


Monday, 1 October 2012

Power to the 36

I, like many of us, seem to have several projects in progress at any one time. One of those currently underway is introduction into service of the Austrains 36 Class that I purchased at Thornleigh in June. I had read enough reports and articles to know what I was purchasing, so an upgrade of the pickups was always anticipated. And yes, additional pickups are needed, because the locomotive did stall on just about every point that it crossed.

Marcus Ammann has a useful article on this topic on his website (http://members.optusnet.com.au/nswmn1/ExtraPickUps.htm).However, not being to good with a soldering iron, I opted for a more simplistic solution and decided to try a phosphor bronze etched pick-up set from Hollywood Foundry. They were reasonably easy to install although the weight and decoder on the other side of the tender chassis did restrict the size of the holes that I could make through the base. Hopefully, there will be enough room to allow movement as the bogie rotates. The wires were simply feed through these holes and soldered to the red and black wires on the other side of the plug on the tender.

With a few test runs to date, the results have been very impressive and, hopefully, stalling is now a thing of the past for this locomotive.


As you can see from the second photo, the pickups are just visible at the rear of the tender but in most situations, there will be a wagons or carriages to obscure them.

The other problem that seems to be associated with the Austrains 36 is its pulling power and the locomotive does feel light compared to others that I own. However, to date, it seems to be able to move a reasonable number of wagons on the level so I will probably  "let sleeping dogs lie" for the present. However, it will probably  need additional weight when the layout is extended to the second level.

So now to the weathering and back to the CCHs!

Friday, 7 September 2012

A Rake of CCHs

Well, not quite yet!

About a month ago, I found two Trax CCH kits in my local hobby shop at a price that seemed reasonable (that said, I have since seen similar kits on Ebay for a lot less). I am still a bit puzzled by the marketing of these because I thought that Trax as a brand of model railway products had ceased quite a while ago.

The kits are very basic and consistent with the AMRM review back in 1981, so it really does seem like a time warp. However, I had a few spare wheel sets and thought that these kits could be the start of a rake of CCH/LCHs that would supplement the transport of coal out of the Philip's Creek mine.  

I assembled them without difficulty adding a few extra details including buffers from my collection of spares. Unfortunately, I found that I needed 25mm wheel sets and I had 26 mm. However, I fitted them but plan to replace them as soon as I get the opportunity. I also have to source some brake shoes.


After I had constructed the first one, I realised the interior was very smooth and not consistent with a timber surface.For the second wagon, I scored the inside in an attempt to get a timber grain finish and deeper groves to simulate individual planks. I'll get a better idea of how it works once the wagon is painted and weathered.


I also tried two widths of styrene for the centre spreader bars. I think I will standardise on the thinner version.

Finally, not surprisingly, the wagons are very light. I have added weight to the bottom of the hopper and in the four locations shown on the photo below.Time will tell if it is sufficient.


Now for the painting and weathering and I will also need to acquire some appropriate decals.

There are a few articles on weathering the CCH.  James McInerney's blog entry early last year is probably the most recent that I can recall. However, coincidentally, the August issue of the Australian Railway History has a great photo of a CCH taken in 1971 on its cover. All of this information will be a great help when I start this activity.

Monday, 20 August 2012

Outshopping Two Projects

Well, I've probably got to a point on two projects where any extra effort outweighs the additional gain, and as such, both have now entered service at Philip's Creek.

The first of these is the backdrop painted by my wife which has been returned to its place behind Mount Windeatt. It now gives a lot of extra depth and detail to this part of the layout that is a very narrow (around 300mm). In time, she can now move onto the next section that, hopefully, will be simpler to execute. However, some family matters and a few overseas visitors over the next 10 weeks mean that this is unlikely to start until November.


The second project has been the EHO guards van. A recent photo published on Rob's Picton blog suggested to me that I still hadn't got it quite right, so it was out with the modelling knife and further adjustment.

The two photos provide  'before and after' images. You could be excused for thinking 'what's changed' other than the central battery box but I think the chassis detail is a little finer now.


By the way, notice the dates on the two photos. I can't believe that it took me so long! No wonder, it has taken me 15 years to get this far!

So now, it's time to move onto the next job, building up the LCH/CCH fleet.

Wednesday, 1 August 2012

The EHO - Hopefully Getting a Little Closer

About a month ago, I posted a short article called "Not Quite There" about the EHO van  that I had just completed and my frustration with the way that the chassis had turned out. Over the past few weeks, I have been doing a bit more work on the chassis and thought that I would put up a couple of photos showing the changes that have been made.


I am still not sure that I have got the major under body components in their correct locations but they align with the information that I have been able to locate to date. There is still a little filling to do before repainting.

And totally unrelated to the EHO, a photo of the workhorse of Philip's  Creek.


Sunday, 15 July 2012

More Silo Progress

I just thought I would put up a few photos showing further progress on the silo.


Most of the front detail has been fitted although there is still a lot of weathering yet to be completed. Many of the detail parts came from Keiran Ryan's  etched brass component kit. It was a great purchase but I have to say that the downpipes were a test of patience and I cheated with ladder, using an old one that I found in my tool box.


The silo remains in three component parts, the base, the silos and the receiving station shelter. I will hold off the final gluing and fixing until the very end.

The focus now returns to the receiving area just visible at the rear of the silo.

Thursday, 12 July 2012

Which Way?

I have to confess to a degree of indecision at present.

In an earlier post, I outlined my plans for the next extension to Philip's Creek. I am fortunate enough to have a three car garage and Philip's Creek resides in the third. At the time of writing the earlier post, access to the second garage had been freed up by a family member moving out. My plan was predicated on being able to relocate some old wardrobes into the second garage to create room for the new section. I had even secured the grudging agreement to my plan from the Chief Property Officer.

Unfortunately, Murphy is alive and well, and there has been a bit of turbulence in the arrangements that originally freed up the second garage.  While this may resolve itself, it has demonstrated that I may have been a bit premature to contemplate the expansion plan outlined in my previous post.

As such, I now need to move to Plan B, going up rather than out.

From what I have been able to discover on the Internet, most double deck layouts are designed as such. Unfortunately, Philip's Creek 'just grewed'. For one thing, the height of the layout, while great for a single level is probably a bit higher that it would be if one was building a multi-level layout from scratch.

If I am to gain the necessary height in the space available, a helix will be a must. However, I am quite confident about the techniques necessary to build one and a number of people have documented their experiences. Ian Millard's series for his layout is a great recent example. (http://liverpoolrange.wordpress.com/2012/05/24/the-helix-part-v/).

The challenge is on the left hand side of this photo
What is causing my indecision is the way in which the upper level will be supported either through a cantilever arrangement or some support structure along the front and back of the upper deck. From what I have found during my research, most planned layouts tend to use a cantilever arrangement. This gives unobstructed access to the lower level. Many of the photos that I found on the Internet showed commercial shelving products being used.
 
I would prefer to use this arrangement but for me, there are two problems. Firstly, any cantilever support will intrude on the smaller than normal space between levels. Secondly, and probably more important, there is no means of securing  the cantilever supports at the rear of the layout in the area on either side of the window (see photo). My current thinking is to run a beam along the length of the layout at the top of the backdrop, conceptually like a picture rail supported by the brick wall where possible, and new columns where necessary, near the garage door. A similar beam would be fixed to the front of the layout using the minimum possible number of columns. The upper deck will then be suspended between the two longitudinal beams.

One of the two problem areas
I remain nervous about the impact of the front columns on the view and on access to the lower deck. As a way of trialling this arrangement, I may temporarily fix a beam and columns to the front and see how easy it is to operate the layout.

A third alternative is to arrange some from of suspension arrangement from the ceiling but this only transfers the obstruction to the upper deck and as portability is still a design factor, it isn't as viable as the second option.

However, if anyone can see an alternative that I have mot considered, please let me know.