Monday 17 December 2012

"So this is Christmas"


"So this is Christmas
And what have you done
Another year over
And a new one just begun
Ans so this is Christmas
I hope you have fun
The near and the dear one
The old and the young"  
     (John Lennon)


And what have you done
Another year over

John Lennon's song started to play in my mind last Saturday  as I was setting up the Christmas tree for another year. It started me thinking about what I have achieved from a modelling perspective over the last 12 months and whether it has been been fun?

The answer to the second question is easy, yes, although occasionally a bit frustrating. The answer to the first questions is a bit more complex. 

It has been a year in which some overdue tasks were addressed, the silo, the Mount Windeatt backdrop and fencing details:
http://philipscreek.blogspot.com.au/2012/06/silo-progress.html  
http://philipscreek.blogspot.com.au/2012/07/more-silo-progress.html
http://philipscreek.blogspot.com.au/2012/04/backdrop-progress.html
http://philipscreek.blogspot.com.au/2012/11/a-waste-of-time.html

Incidentally, the silo still resides on display in the family room because there is no place for it on the layout as yet and the fencing has not advanced any further than what was described in the post.

It has also been a year of  upgrading and learning, particularly additional detail for the EHO and the CCH/LCH fleet:
http://philipscreek.blogspot.com.au/2012/05/paint-stripping-and-other-progress-on.html
http://philipscreek.blogspot.com.au/2012/08/the-eho-hopefully-getting-little-closer.html
http://philipscreek.blogspot.com.au/2012/10/more-on-cch-two-down-14-to-go.html

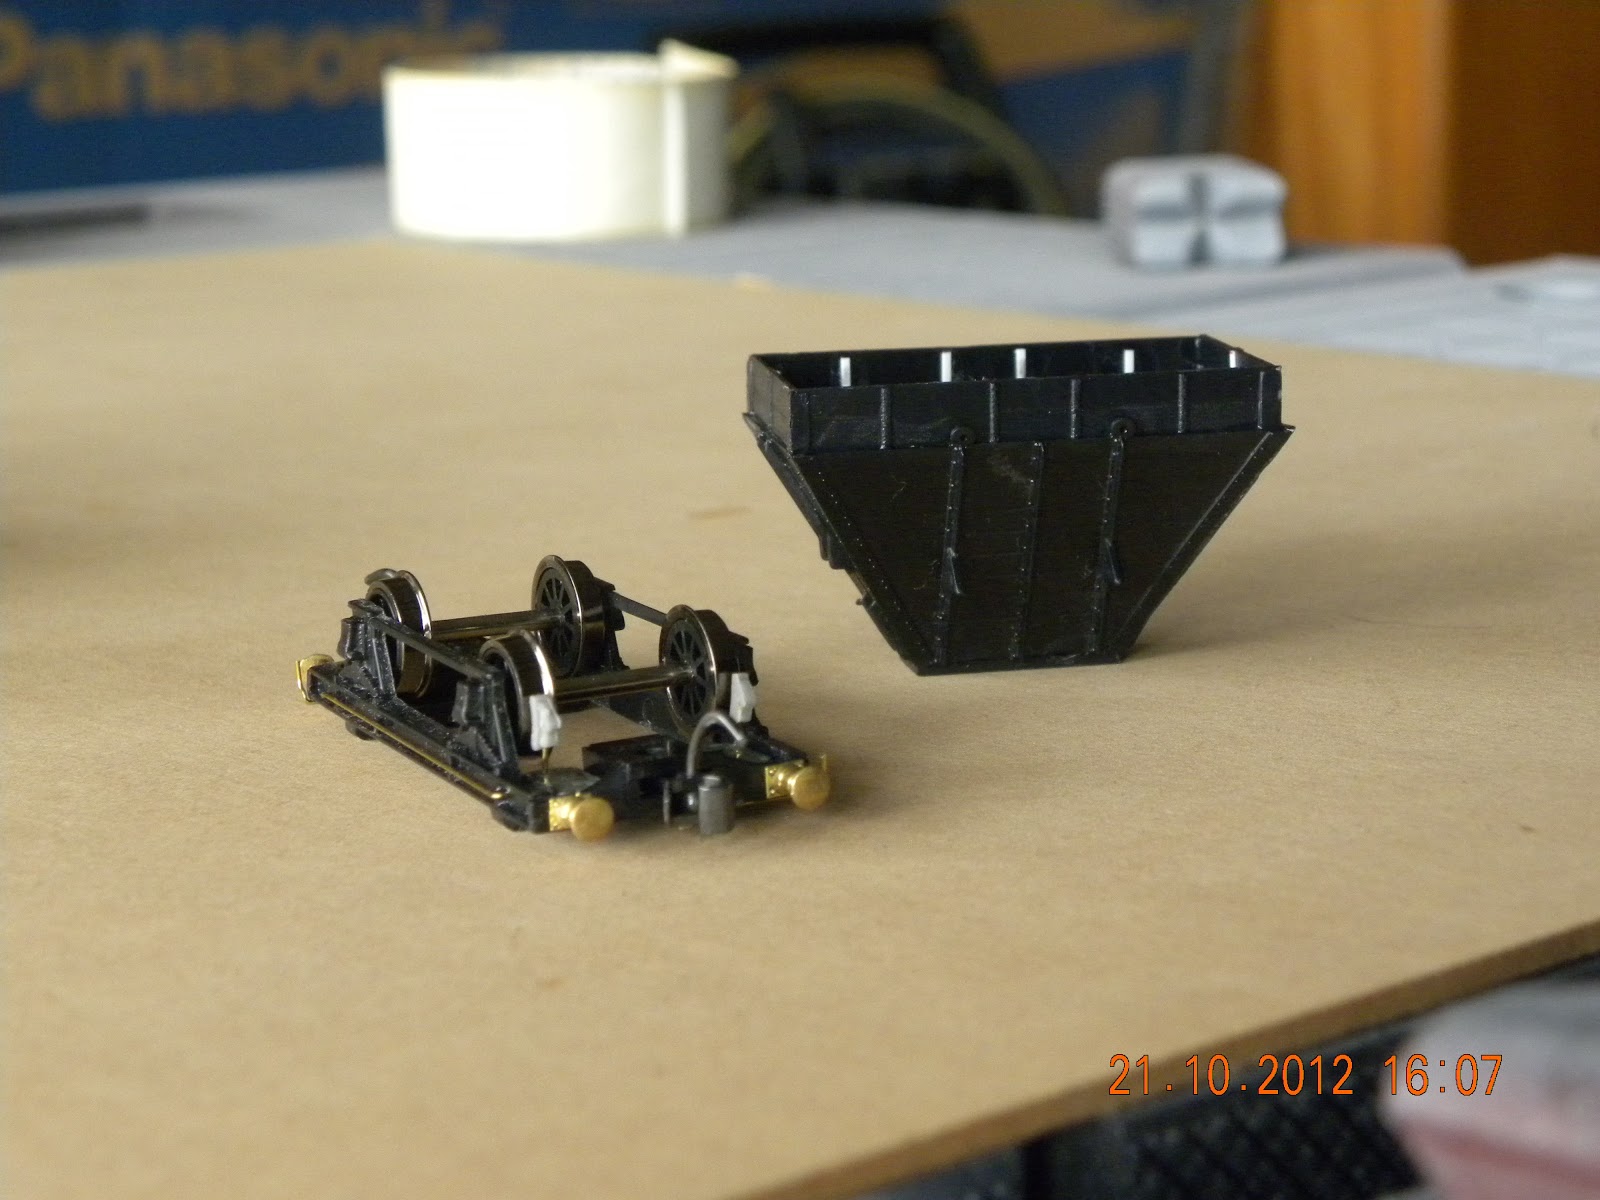
The next coal wagon (this time a LCH) is now nearing completion and, hopefully, will be in service just after New Year.

The year also saw some opportunity purchases that have added to the roster, the 36 Class ( http://philipscreek.blogspot.com.au/2012/10/power-to-36.html ), the EHO, the start of the CCH/LCH fleet and two new  MHGs have been the major acquisitions in 2012 . The latter purchase has allowed me to commence an upgrade program for my original Powerline MHGs.

Commercially, it has also had some frustrations as some long overdue orders have failed to appear. Hopefully, 2013 will see the addition of the Trainorama 48 class and the SDS three dome tanker set.

Finally, it has also been a year of planning, re-planning and more re-planning as I have struggled to decide how best to extend the layout:
http://philipscreek.blogspot.com.au/2012/02/next-phase.html
http://philipscreek.blogspot.com.au/2012/07/which-way.html 


Right now I am up to Plan C, that looks more like Plan A than Plan B!

And a new one just begun

So what is planned for 2013, assuming the Mayans have got it wrong.

One piece of good news is that another relocation does not appear to be on the horizon for at least 12 months - I've probably jinxed myself now!

As mentioned earlier, I would like to think that the commercial products that I have had on order will finally arrive.  Certainly, the CCH/LCH construction program will continue and the MHG upgrades will be completed but beyond that, I'm not sure. No doubt there may be some opportunity purchases but that will depend, in part, on what emerges during the year (ready to run or kits).

As for the layout, I would like to think that I can make a start on the expansion plans. I do know that the growth in the rolling stock roster is starting to put some pressure on the staging areas. They are getting quite crowded.

I hope you have fun
The near and the dear one
The old and the young

And so in closing for 2012, I would like to take this opportunity to wish all those who read this post, as well as your "near and dear ones", a very Merry Christmas and a Happy New Year for 2013.


Wednesday 21 November 2012

A Waste of Time?

We enjoy most activities associated with this hobby - we wouldn't be involved in model railways if we didn't. When it comes to layout construction jobs, most people have strengths and weaknesses, and, as such, are better at some tasks than others. For me, I am happiest adding the finishing details rather than the basic work required to construct the baseboard, lay the track and install the wiring. While I am capable enough to complete these activities, they are something that must be done rather than something that can be enjoyed. For me, wiring is a particular chore. However, over the past week or two, I have come across a scenery construction task that is almost as bad and it too involves wire. I am talking about fence building.

This was a job that kept sliding down the 'to do' list until I ran out of excuses for not doing it. In NSW, most rural areas, by the 1960s, had well established fences. I had constructed a few around specific buildings, one particular house and the water treatment plant. However, the glaring omission was a fence between the rail easement and the Philip's Creek village. I had previously purchased a few packets of the Kerroby Models wire fences to provide the fence posts and, in my late father's workshop, I found some very light gauge wire. This was very very old wire that had cloth rather than plastic insulation. In fact, the wire is that old that I suspect that my father may have acquired it from his father who used to work in the NSW Railways Electric Car Workshops at Chullora in the 1930s to 1950s. So another convoluted reason why I should stop procrastinating.

The fence line with the bottom three wire strands fitting - and barely visible!
So I was set! The fence posts were painted and then planted, and then the problems started. Threading the wire through the holes in the fence post was quite a challenge. When I was young, my mother would often ask me to thread a needle for her because "my eyes were younger than her's". Well, now, my eyes are not so young anymore, and I have no children left at home to ask. Even with my strongest set of reading glasses, it has proved to be a challenge particularly as each post is spaced about 50mm apart and there are five holes per post. I have ended up using a torch to backlight each post to give a better view of the holes.

Another view of the fence - the Royal Hotel has suffered a bit during construction
The other challenge has been working around the urban encroachment of Philip's Creek. Some smaller items could be moved but power poles and the Royal Hotel have caused more than a few problems, and there has been some minor damage to both.

At the time of writing, this section of fence is only 60% completed and I'm beginning to think that I have wasted my time. There are still quite a few metres of fencing to finish. Maybe, I should have just planted the fence posts to create an optical line and let people's imagination do the rest. Certainly, the wire is barely visible in the accompanying photos. This probably means the gauge of the wire is about right but this activity has convinced me never to attempt power and telegraph line reticulation!!

However, not wishing to close on a negative note, I have added a few photos of the latest additions to the Philip's Creek roster, the recently weathered 36 class (that sound like a contradiction of terms) and the four completed CCHs.


Tuesday 23 October 2012

More on the CCH - Two Down, 14 to Go


In an earlier post, I wrote about the start of construction of a fleet of CCH/LCH coal wagons. At the time, I was just about ready to start painting, but two very helpful comments provided extra information allowing me to add some more detail before going to that final step.

The first comment was from Linton (Stonequarry Creek, http://stonequarrycreek.blogspot.com.au/ ) who told me about brake shoes being sold by Ina Lindsay models. I followed up on his information and purchased a set. They are easy to fit, and have worked well. Initially, I used styrene rod to fix each shoe to the body but then decided that brass wire was easier.

The second comment from Alex, (the Mudgee Line, http://mudgeeline.blogspot.com.au/) gave me a link to photos that he had taken of CCH 20031 (http://www.flickr.com/photos/railmod/8005913637/). These proved invaluable particularly for the detail of the opening device for the hopper. I fashioned some brass wire and thin strip to replicate this arrangement.

Many thanks to both gentlemen for their input. It was greatly appreciated.


I purchased two more kits from Joe while at the Liverpool exhibition and also 'lashed out' to buy some brass buffers. For the second pair, I added a little less weight than for the first two. It will be interesting to see if there is any difference in their performance over points.

The production line
I will also be experimenting more with the weathering. Photos that I have seen from the late 1960s indicate that the CCH/LCH fleet had seen better days, and so the weathering should be able to reflect the variety of age and conditions.

So right now, the fleet consists of two completed wagons and two under construction. I’ll progressively purchase and construct kits over the next year or so to build up the fleet. There’s no great hurry and I'm sure other projects will intervene at times.


In service and awaiting pickup


Monday 1 October 2012

Power to the 36

I, like many of us, seem to have several projects in progress at any one time. One of those currently underway is introduction into service of the Austrains 36 Class that I purchased at Thornleigh in June. I had read enough reports and articles to know what I was purchasing, so an upgrade of the pickups was always anticipated. And yes, additional pickups are needed, because the locomotive did stall on just about every point that it crossed.

Marcus Ammann has a useful article on this topic on his website (http://members.optusnet.com.au/nswmn1/ExtraPickUps.htm).However, not being to good with a soldering iron, I opted for a more simplistic solution and decided to try a phosphor bronze etched pick-up set from Hollywood Foundry. They were reasonably easy to install although the weight and decoder on the other side of the tender chassis did restrict the size of the holes that I could make through the base. Hopefully, there will be enough room to allow movement as the bogie rotates. The wires were simply feed through these holes and soldered to the red and black wires on the other side of the plug on the tender.

With a few test runs to date, the results have been very impressive and, hopefully, stalling is now a thing of the past for this locomotive.


As you can see from the second photo, the pickups are just visible at the rear of the tender but in most situations, there will be a wagons or carriages to obscure them.

The other problem that seems to be associated with the Austrains 36 is its pulling power and the locomotive does feel light compared to others that I own. However, to date, it seems to be able to move a reasonable number of wagons on the level so I will probably  "let sleeping dogs lie" for the present. However, it will probably  need additional weight when the layout is extended to the second level.

So now to the weathering and back to the CCHs!

Friday 7 September 2012

A Rake of CCHs

Well, not quite yet!

About a month ago, I found two Trax CCH kits in my local hobby shop at a price that seemed reasonable (that said, I have since seen similar kits on Ebay for a lot less). I am still a bit puzzled by the marketing of these because I thought that Trax as a brand of model railway products had ceased quite a while ago.

The kits are very basic and consistent with the AMRM review back in 1981, so it really does seem like a time warp. However, I had a few spare wheel sets and thought that these kits could be the start of a rake of CCH/LCHs that would supplement the transport of coal out of the Philip's Creek mine.  

I assembled them without difficulty adding a few extra details including buffers from my collection of spares. Unfortunately, I found that I needed 25mm wheel sets and I had 26 mm. However, I fitted them but plan to replace them as soon as I get the opportunity. I also have to source some brake shoes.


After I had constructed the first one, I realised the interior was very smooth and not consistent with a timber surface.For the second wagon, I scored the inside in an attempt to get a timber grain finish and deeper groves to simulate individual planks. I'll get a better idea of how it works once the wagon is painted and weathered.


I also tried two widths of styrene for the centre spreader bars. I think I will standardise on the thinner version.

Finally, not surprisingly, the wagons are very light. I have added weight to the bottom of the hopper and in the four locations shown on the photo below.Time will tell if it is sufficient.


Now for the painting and weathering and I will also need to acquire some appropriate decals.

There are a few articles on weathering the CCH.  James McInerney's blog entry early last year is probably the most recent that I can recall. However, coincidentally, the August issue of the Australian Railway History has a great photo of a CCH taken in 1971 on its cover. All of this information will be a great help when I start this activity.

Monday 20 August 2012

Outshopping Two Projects

Well, I've probably got to a point on two projects where any extra effort outweighs the additional gain, and as such, both have now entered service at Philip's Creek.

The first of these is the backdrop painted by my wife which has been returned to its place behind Mount Windeatt. It now gives a lot of extra depth and detail to this part of the layout that is a very narrow (around 300mm). In time, she can now move onto the next section that, hopefully, will be simpler to execute. However, some family matters and a few overseas visitors over the next 10 weeks mean that this is unlikely to start until November.


The second project has been the EHO guards van. A recent photo published on Rob's Picton blog suggested to me that I still hadn't got it quite right, so it was out with the modelling knife and further adjustment.

The two photos provide  'before and after' images. You could be excused for thinking 'what's changed' other than the central battery box but I think the chassis detail is a little finer now.


By the way, notice the dates on the two photos. I can't believe that it took me so long! No wonder, it has taken me 15 years to get this far!

So now, it's time to move onto the next job, building up the LCH/CCH fleet.

Wednesday 1 August 2012

The EHO - Hopefully Getting a Little Closer

About a month ago, I posted a short article called "Not Quite There" about the EHO van  that I had just completed and my frustration with the way that the chassis had turned out. Over the past few weeks, I have been doing a bit more work on the chassis and thought that I would put up a couple of photos showing the changes that have been made.


I am still not sure that I have got the major under body components in their correct locations but they align with the information that I have been able to locate to date. There is still a little filling to do before repainting.

And totally unrelated to the EHO, a photo of the workhorse of Philip's  Creek.


Sunday 15 July 2012

More Silo Progress

I just thought I would put up a few photos showing further progress on the silo.


Most of the front detail has been fitted although there is still a lot of weathering yet to be completed. Many of the detail parts came from Keiran Ryan's  etched brass component kit. It was a great purchase but I have to say that the downpipes were a test of patience and I cheated with ladder, using an old one that I found in my tool box.


The silo remains in three component parts, the base, the silos and the receiving station shelter. I will hold off the final gluing and fixing until the very end.

The focus now returns to the receiving area just visible at the rear of the silo.

Thursday 12 July 2012

Which Way?

I have to confess to a degree of indecision at present.

In an earlier post, I outlined my plans for the next extension to Philip's Creek. I am fortunate enough to have a three car garage and Philip's Creek resides in the third. At the time of writing the earlier post, access to the second garage had been freed up by a family member moving out. My plan was predicated on being able to relocate some old wardrobes into the second garage to create room for the new section. I had even secured the grudging agreement to my plan from the Chief Property Officer.

Unfortunately, Murphy is alive and well, and there has been a bit of turbulence in the arrangements that originally freed up the second garage.  While this may resolve itself, it has demonstrated that I may have been a bit premature to contemplate the expansion plan outlined in my previous post.

As such, I now need to move to Plan B, going up rather than out.

From what I have been able to discover on the Internet, most double deck layouts are designed as such. Unfortunately, Philip's Creek 'just grewed'. For one thing, the height of the layout, while great for a single level is probably a bit higher that it would be if one was building a multi-level layout from scratch.

If I am to gain the necessary height in the space available, a helix will be a must. However, I am quite confident about the techniques necessary to build one and a number of people have documented their experiences. Ian Millard's series for his layout is a great recent example. (http://liverpoolrange.wordpress.com/2012/05/24/the-helix-part-v/).

The challenge is on the left hand side of this photo
What is causing my indecision is the way in which the upper level will be supported either through a cantilever arrangement or some support structure along the front and back of the upper deck. From what I have found during my research, most planned layouts tend to use a cantilever arrangement. This gives unobstructed access to the lower level. Many of the photos that I found on the Internet showed commercial shelving products being used.
 
I would prefer to use this arrangement but for me, there are two problems. Firstly, any cantilever support will intrude on the smaller than normal space between levels. Secondly, and probably more important, there is no means of securing  the cantilever supports at the rear of the layout in the area on either side of the window (see photo). My current thinking is to run a beam along the length of the layout at the top of the backdrop, conceptually like a picture rail supported by the brick wall where possible, and new columns where necessary, near the garage door. A similar beam would be fixed to the front of the layout using the minimum possible number of columns. The upper deck will then be suspended between the two longitudinal beams.

One of the two problem areas
I remain nervous about the impact of the front columns on the view and on access to the lower deck. As a way of trialling this arrangement, I may temporarily fix a beam and columns to the front and see how easy it is to operate the layout.

A third alternative is to arrange some from of suspension arrangement from the ceiling but this only transfers the obstruction to the upper deck and as portability is still a design factor, it isn't as viable as the second option.

However, if anyone can see an alternative that I have mot considered, please let me know.


Saturday 23 June 2012

Not Quite There

While we are always happy to display or talk about a great model that we have created, this is a post about one of those jobs that is just not quite right and not to the standard that one sets oneself.

I mentioned in an earlier post that I was building a kit of an EHO passenger guards van and spoke about having to remove a coat of paint because it was more purple than indian red. That process went reasonably well and the replacement colour is satisfactory. I also 'tea bagged' the roof, again with fairly positive results. I chose not to add wire handrails which was probably  a bit of a shortcut but the ones that were cast into the body were reasonably prominent. Besides, wire handrails are not one of my strengths if one looks at my collection of S trucks, BCHs et al.

However, it is the chassis that has caused me to be less than satisfied with the results particularly after I came across photos of James McInerney's EHO (http://lambingflat.blogspot.com.au/2011/01/eho1473-or-is-it-1469.html

I had constructed the guards van in accordance with the instructions although I noted that a large battery box shown on the plan in the July / August 1967 edition of AMRM mounted underneath the centre door in addition to the two boxes at one end was not included. The truss also looks too thick and the chassis sits a bit higher than it should.

So, I think it's back to the drawing board as far as the chassis is concerned. I think that I will cut off the plastic trusses and use them to shape wire replacements. That will test my soldering skills if I remember the construction of the HCX quite a few years ago. I'll probably add another battery box and see if the chassis can be lowered slightly.

Oh well, lesson learnt - more research before construction!

As an aside, I was intrigued to note the provision made for the movement of coffins in the van. It's something that I hadn't considered previously. However, now that I am aware of it, I have noted similar compartments in other types of passenger guards vans.

Monday 11 June 2012

Time Elasticity

I managed to get to Epping Model Railway Club's exhibition at Thornleigh on Sunday afternoon. Others have already commented on the exhibition and I can only echo their positive comments. It was a great show and most the layouts were new to me.
 While there, I took the opportunity to purchase an Austrain's 36 class that was on special. Now I have a bit more weathering to complete and have been scouring my copy of 'Steam in the Sixties' for ideas. However, the purchase does present me with a slight quandary. I understand that the withdrawal of 36 class was completed by 1969 but Philip's Creek had been set in 1971. While I have been happy to develop an imaginary location, I have previously been reasonably pedantic about the time. I had pushed the envelope to the right a bit with a 1971 BCW and a KHG guards van both of which I purchased quite a few years ago. In contrast to other rolling stock, these two wagons are only lightly weathered reflecting their almost new status in 1971.
I began to consider that I may have been overly restrictive when discussing describing Philip's Creek to another railway modeller over dinner a few weeks ago and have been pondering it ever since. So now, I have to accept that Philip's Creek now covers a period from around 1966 to 1971 - not a great time span, but one over which there were some noticeable changes in the railways in NSW. My first thought is to ensure that each train that passes through Philip's Creek station is consistent with a particular time. For example, I don't anticipate that the 36 class will ever haul a train that includes the KHG or the 1971 BCW. Beyond that, I don't expect too many issues, but I will have to watch the motor vehicles that are present on the layout. Potentially there may also be a  few inconsistencies there.
I know this post has been a bit of 'navel gazing', but I am wondering if now, having  made this first compromise, it be the 'thin edge of the wedge'. Probably not, but only time will tell!

Thursday 7 June 2012

Silo Progress

Work on the silo has progressed at a slow but steady pace. I thought that it was time to post a few photos of the receiving station which has come together over the past few weeks. I might add that since the photos were taken, the roof has also been fitted. However, again I have run out of CGI. Hopefully Anton will bring a good supply to Thornleigh this weekend.

The receiving station is the last of the major components to be fabricated. Once that element has been painted, I will start the the final assembly and detailing. As I have mentioned previously, although this is nominally a cardboard kit, the cardboard is being used more as a template than the final external surface. Styrene and model CGI are the primary building materials.

And yes, there are easier ways to get a silo!

The apparent sag on the left side has been corrected to some extent when the roof was fitted. However, I will also have to make a few further adjustments once the frame is fixed to the base.

The view from the other side showing most of the framing.


Sunday 27 May 2012

Paint Stripping and other progress on Philip's Creek

I was tempted to use the well-established media practice of misleading or exaggerated headlines as a title for this post but eventually decided against it.

I mentioned earlier that I had recently purchased an EHO guards van kit and the self-induced pressure to assemble it led to a quick adjustment of priorities. For guidance, I consulted Ray Pilgrim's short article on the kit published in AMRM a few years ago as well as some other photos and an earlier plan also in a much earlier issue of AMRM.

The kit went together without difficulty although I'm not sure that I have got the width of the running boards correct. I then proceeded to paint the model while it was in three parts; roof, body and chassis. For the body, I had purchased a jar of paint labelled as Indian Red that I understood was the correct colour for a van in the last 1960s. However, the colour that emerged was a deep purple or maroon, closer the colour of the Queenslanders’ jerseys  on TV last Wednesday night. I decided to remove the paint and start again. The hunt was on for an appropriate way to remove the paint without damaging the detail. After a search of online advice, I experimented (very gingerly I might add) with three options; methylated spirits, white spirits and nail polish remover. Of these,  the nail polish remover delivered the best outcome.

The paint stripping in progress.
The irony of this photo is that the paint colour looks
much better than it appears to the Mk 1 eyeball.

I used a small syringe to wash over a portion of the wall, waited for a few minutes and then brushed it with a stiff bristle brush. I didn't want to remove the primer that I had applied earlier, hence the grey colour that you can see in the photo.

As yet, I haven't got around to repainting. Hopefully that can happen next week. Once that has been done, I will then add some additional weight, assemble the three elements, finsih the model and then weather.

On other projects, the back drop had another test fit and continues to progress slowly. My wife reminds me that I am getting a work of art and that takes time - we'll get there eventually.

The silo continues to progress slowly although the purchase of Keiran Ryan's  etched brass component kit has added some nice detail particularly around the receiving area.

To finish this post, the following are a couple of recent photos from Philip's Creek.


3123 awaiting more shunting duties


The new Halt for the Philip's Creek mine employees.
 Still not yet complete with signage and fencing to add


Sunday 29 April 2012

Backdrop Progress

This is just a quick post after a test this morning when we refitted the backdrop to see how things lined up. I have added a few photos to show the progress to date. I was very pleasantly surprised to see how much it seems to lift the Mount Windeatt area of the railway. These few photos capture the progress to date and identify where extra work is needed.


This photo was taken through the garage window being the only place where I could get enough distance to get an overall image.

Still a bit more work to do lining up the road and the terrain in the immediate vicinity.


This area still needs a bit more work with a number of trees to be painted onto the immediate foreground and probably a toning down of the green in the ridge in the middle ground.


Again, this section will also receive more attention. Mount Windeatt, the significant feature in the middle distance has already been recoloured to align the geology of the other visible rock faces. The white objects to the left are meant to be tombstones but need to shrink considerably.


This portion is very promising but the race track in the middle distance still needs finishing.


Saturday 28 April 2012

April Activities


It's hard to believe that another month has almost disappeared. I still haven't found a solution to the chronic shortage of time. Yet there have been some small steps forward at Philip's Creek.

I managed to finish off at least one job this month with the MFE now back in service. I am reasonably happy with the roof for the first attempt and the interior detail can withstand reasonably close scrutiny although that's not apparent from the photo.

Work on the silo has resumed and the cupola is now ready for painting. The silo is a LJ kit but with many surfaces overlaid with other materials almost to the extent of being a 3D version of 'paint by numbers'. For example, the cupola shown in the photo is substantially complete having be re-clad with scale CGI. I will give it a coat of grey primer shortly and start to weather individual sheets. The cupola has not yet been permanently fixed to the silos.I know there are probably easier ways of doing this but it's an interesting challenge. However, I do notice also that Kieran Ryan is selling a etched brass component kit that will make things a bit easier.

The backdrop painting has commenced and moves ahead in fits and starts. But I can't complain - it took 10 years for my wife to knit a sweater and she still hasn't finished her first novel yet and it was started six years ago. However, she is also very quick to remind me that Philip's Creek is not finished either and I have been working on it for over 15 years! Still very much a work in progress and there are still another about another six backdrops to go.


Another small project that has been started came about as a consequence of the withdrawal of the CPH from service. I had constructed a small platform on a siding at the Colliery for the use of the mine employees. The CPH would then do a shuttle run from the mine through Philip's Creek and on to Mount Windeatt. With the loss of the CPH. I decided to relocate the platform to the closest point on the main line.
The existing platform will remain for freight and equipment delivered to the mine. Incidentally, the container to the right of the photo is a product that I purchased quite a few years ago from an art supplier for use as a platform surface. It contains a sandstone coloured paste with a black fleck that gives a reasonable representation of the fine gravel surface that I recall on some platforms in earlier years.

I have also recently purchased a EHO guards van and will probably be tempted to start building that kit sometime soon, probably to the detriment of progress on the silo.

And speaking of building things.....

"I wish the bloke who built this place had done a better job, he couldn't get the awning right and I'm always having to fix something!"


Sunday 1 April 2012

Bits and Pieces

After quite a few years of modelling, I am quite convinced that the three main impediments to progress are time, finance and space. Of these, space is probably the least of these. You need only look at the variety of solutions published in magazine articles or on the internet to see the creative solutions that have been developed to deal with a lack of space. While we will often whinge about a lack of space, we do manage to create something.
 However, time and finance are probably the more difficult and unless you win the lottery, often mutually exclusive. When you have some funds coming in, often you are time poor and when you do have time available, you probably don't have a level of disposable income to expend on the hobby. Right now, I am very clearly in the first category although I can foresee that not too much farther down the track, the reverse will be true.
 This is a long way of saying that I haven't made any massive leaps forward over the past month and this arrangement is likely to continue for the foreseeable future.

The Silo

Work on the silo has almost stalled because I ran out of suitable corrugated iron and had to wait until I could get some more from my preferred source, Anton's. Work will resume on the silo after I have completed the 'filler' project that I started in lieu.

The MFE Upgrade


The roof has had some weathering with powders
 but not the extent described in Ian's article.

Very soon after I started work on Philip's Creek in 1997, I purchased a Lima MFE coach. While it had received a basic weathering, unlike my other passenger coaches, I had not fitted an interior. With an imposed delay on the silo, I took the opportunity to complete this work. I also decided to try upgrading the appearance of the roof using the technique described by Ian Phemister in his blog and article in AMRM. It worked well although I learned that there are tea bags and there are tea bags, and some are more suitable than others for this role. I also didn’t read his article closely enough and failed to work from both ends towards the middle.  However, I am reasonably happy with the end product and will probably tackle my FS and BS coaches when I can find time.
I purchased a MFE interior kit from Casula Hobbies and prefabricated the interior to be inserted after painting. After a primer, I hand painted the ‘timber panelling’ using a couple of coats of an acrylic paint, ‘raw sienna’. I wasn’t too worried about even coverage because the timber finish is not uniform.
It was also necessary to remove the thick glazing and replace them with a very thin clear material.
There is still some more work to complete by adding some passengers and refixing everything. I haven’t checked the under body closely at this time but suspect that any work there may have to wait.
The Backdrop
I mentioned backdrops in an earlier post.  My ‘better half’ has volunteered to paint these for me and I have now removed one from the layout to facilitate this. In the meantime, I grabbed the opportunity to take a few photos from angles not normally available when the backdrop is in place.

Projects for April

Bearing in mind my original comments, I hate to forecast anything but I’d like to think that I can finish what I started in March and move the silo project forward. Here’s hoping!
Have a great Easter break!